I am so glad you are here! Scroll down to read my latest blog posts, or check out the links on the right to browse my TPT shop or my collection of FREE math slide decks. Enjoy!
I don't know about you, but I love sensory bins! Over the next few weeks I will be sharing some tips, tricks, and ideas for using sensory bins in the classroom. I will link all of the posts here, so make sure to bookmark this page to keep updated on all things sensory!
One of the biggest benefits to teaching in a special education classroom is having the flexibility to meet the students where they are at. Everything is specially designed to build upon their skills and make the content accessible. With that being said, this focus on individualization can make it a challenge to create common learning targets for all students.
I like to keep my overall classroom learning targets general, and my small group learning targets more specific. For example, as a class we may be focusing on fractions and my 3 small groups could have more targeted objectives ranging from identifying whole objects to adding fractions with like denominators.
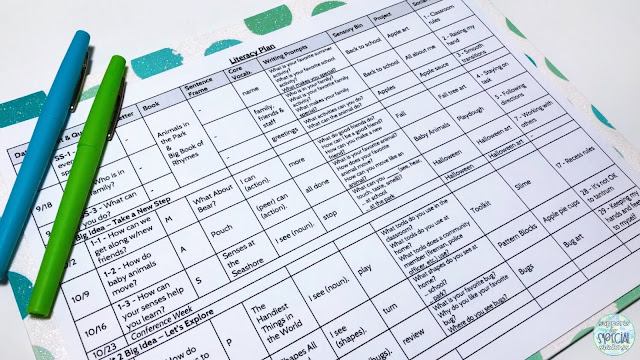
Since my main classroom learning targets are general, I only have to swap them out once a week or once a month. I find this far more manageable than trying to update our big focus wall daily. The other time saving step that I take is pre-planning all of my weekly objectives. I create a scope and sequence each year with all of the "big ideas" that I plan to teach. I use this document to create my focus wall cards. You can read more about how set up my scope and sequence HERE.
I like to print off all of my focus wall cards over the summer and organize them in the order that I plan to teach the topics (this is where that scope and sequence comes in handy!). Since the cards are in order, it takes me less than 30 seconds to swap out the cards each week. You heard that right... less than 30 seconds a week!
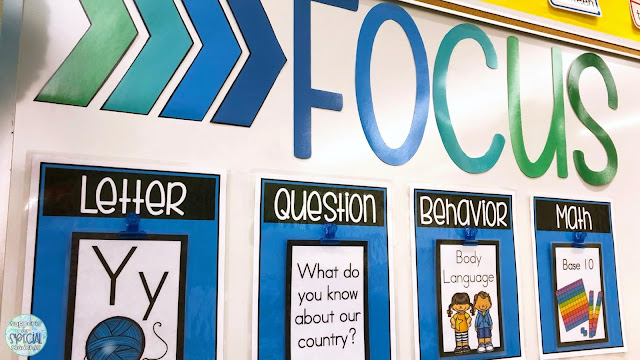
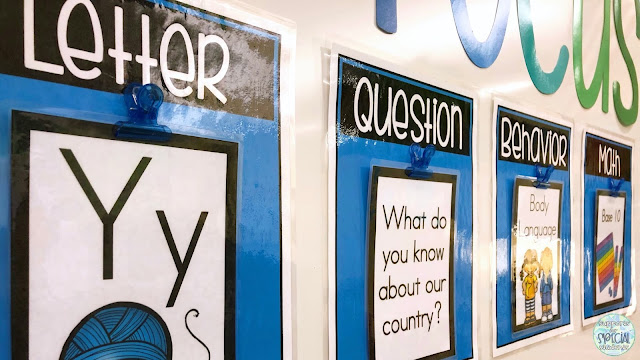
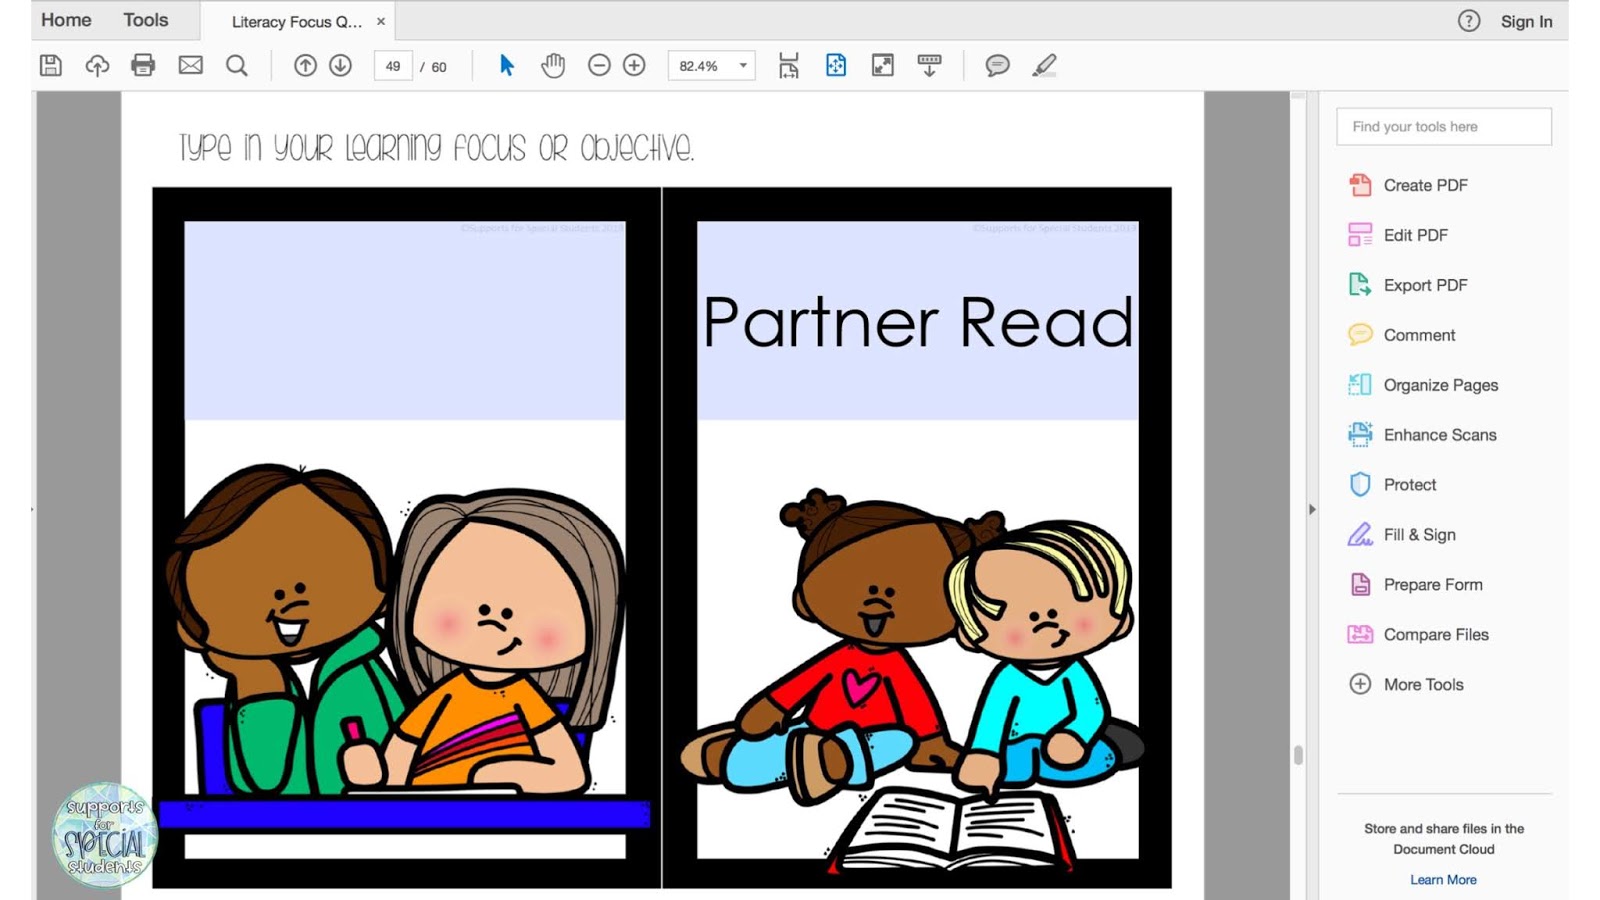
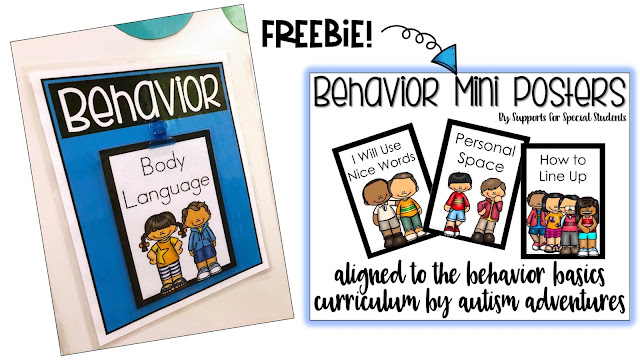
For my focus wall I typically include a weekly essential question, letter of the week, math focus, and behavior focus. The letter and math cards are included in my Focus Wall Bundle, and I use the editable cards from the file to type out my essential question. These questions align to our district's general education reading curriculum.
I created the behavior cards to align to Autism Adventures' Behavior Basics program. The program is amazing and provides multiple levels of social stores and activities for 60 different behaviors and social skills. It is well worth the investment. If you are using the program and would like focus wall cards that align to each of the behaviors... you're in luck! Mellissa from Autism Adventures was kind enough to allow me to share the cards with you! You can pick up the exclusive download HERE.
Are you ready to set up your own focus wall? Well I have some great news! I have pulled together all of my focus wall products into one big discounted bundle and you can find it HERE. Not a fan of the blue and green that is in my classroom? Not to worry! I recently updated the file to include 27 color options. I hope that this makes it easier for you to create the focus wall of your dreams!
Do you want an even closer look at the product? Check out the video preview! Have a great school year!
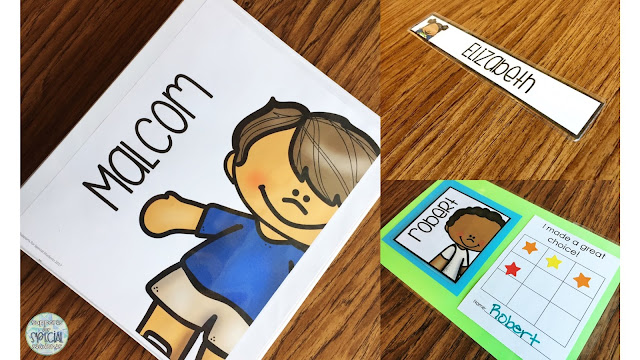
I love for my students to feel at home in our classroom. Part of the way that I make that happen is by posting their names throughout the room. I label their desks, binders, folders, cubbies, sticker charts and book bins. I know what you are thinking... who has time to create personalized labels for EVERYTHING!?! Well, it doesn't take as much time as you may think.
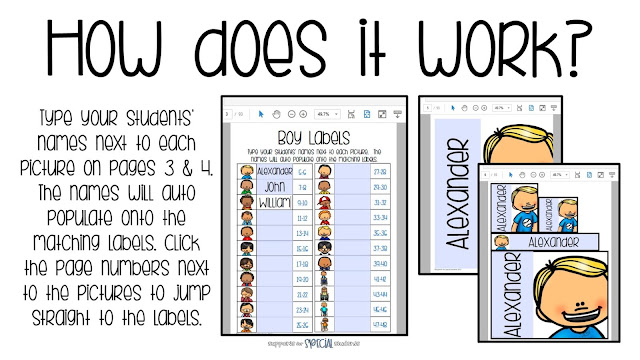
I use The Ultimate Set of Student Labels to create personalized labels for all of my students. And the best part? It only takes a few minutes! Don't believe me? Let me show you how I do it.
Type in your students' names once, and they autopopulate onto every label! So simple! Just print, cut, and you're done! I told you it was quick!
There are 5 sizes of labels, each of which can be used in multiple ways. I love to use the full sheets for my students' work binders and communication folders. I use the half sheet size for their cubbies. The long strip (which fits in the long adhesive pockets from the Target Dollar Spot) are perfect for name tags and binder spines. I use the larger square for their sticker charts and the smaller rectangle for the front of their bins. The larger squares fit perfectly in the 3 1/2 inch adhesive pockets from the Target Dollar Spot, or you can find this huge pack on Amazon (affiliate link).
What about you? Do you use personalized labels in your classroom? If not, I encourage you to give it a try! Your students will love it! If you want to check out the pack that I use in my classroom you can find it HERE. Have a great school year!
Seriously, this job is huge. There is no possible way that you can do it alone. (If you can... send me a message because I want to learn your ways!) You need help. More often than not that help does not come in the form of staffing. You need to actively seek out an army of volunteers. Check out my 6 out of the box ideas for getting volunteers into your special education classroom.
1. Middle School/High School Helpers - Many districts have a community service requirement for middle school and high school students. What better place for them to give back than in your classroom?
2. Transition Students - Does your district offer a transition program for students age 18-21? If so, consider collaborating with the instructor to see if your classroom can serve as a job site.
3. College Interns - There are many opportunities to open your classroom to college interns, not just official student teachers. Reach out to local colleges and universities to see if they are looking for additional classroom placements.
4. Military - Did you know that many branches of the military have school liaison officers who serve as a link between military families and schools? While their primary role is to support students and families, they also support educators with training and resources. Consider checking with your local school liaison officers to see if they can coordinate volunteers to support military students in the classroom.
5. PTA - Are you running short on parent volunteers from your class? Check with your PTA to see if there are any parents from other classrooms who may be interested in helping out in your room.
6. Boy Scouts - Do you need help with a specific project? Check with your local boy scout troop. They are often looking for service opportunities within their community. Building furniture, designing adaptive equipment, and supporting their peers are all worth while projects that the Boy Scouts may be willing to take on.
Do you have any unconventional ways to recruit help in your classroom? Please share!
Over the past few years Google has slowly been taking over my life. I use Gmail, store all of my files in Google Drive, use Google Calendar to schedule all of my meetings, and use Google Forms to collect data (for more info about how I use Google Forms, check out The Simple Way I Track Behavior in My Class... Digitally!). What's the one area where I continue to use a paper and pen? Lists! I love a good to-do list and have a bazillion sticky notes to prove it!
Last week I talked about using the 4-square method for prioritizing your work load. You can find the post HERE. It is basically a simple way of mapping out the level of importance and urgency of each task. It is often done in a grid with the level of urgency across the top and the level of importance down the side. If you like the paper version, you can pick up a free copy HERE.
If you are more of a digital note taker, or you want to become one, Google Keep is a great option. It is a simple application that lets you customize digital sticky notes. The great thing about Google Keep is that you can access it from nearly any device. This is a huge bonus if you are working on your to-do list outside of the classroom.
Assuming that you already have a Google account, you can access Google Keep for free. To find it, click on the Google grid in the upper right corner of your Google Drive. If you don't notice the app in the menu, click on the option to check out more from Google.
Once you have access to Google Keep, you can start designing your notes. Just click on "take a note" and start typing. I prefer to have one note for each quadrant of the 4-sqare, and I add the heading of the quadrant to the title of each note.
Important and Urgent
Important but Not Urgent
Urgent but Not Important
Not Urgent and Not Important
Google Keep gives two options for viewing your notes - grid view and list view. Grid view gives you more of the "4 quadrant" feel, however, it adjusts the placement based on the screen size so it often puts 3 notes across. I prefer list view. This stacks the notes so I can put them in order of priority.
Google Keep also gives you the option to add checkboxes. This is a no-brainer for me. Of course I want checkboxes. I am notorious for putting super simple tasks on my to-do list just so I can check them off! To add check boxes, just hover over the note and click on the 3 dots. Choose - show checkboxes.
Are you into color coding? Find the paint palette in the tool bar at the bottom of each note and select a color. You can also add a picture, but I never use this feature as it tends to take up way too much space.
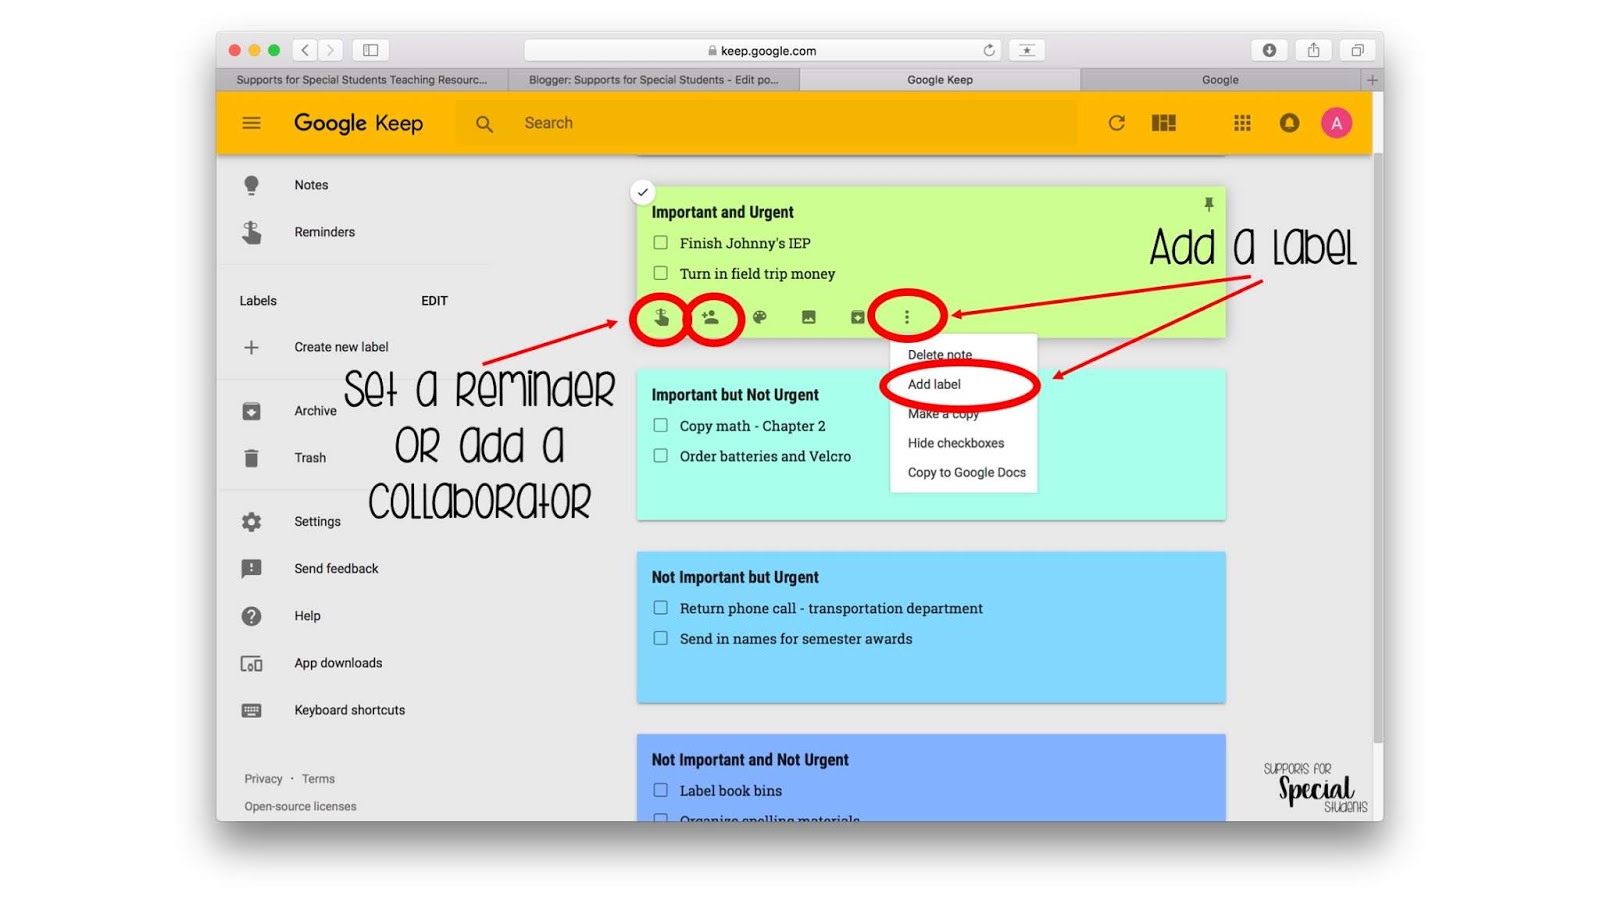
Google Keep also gives you some more advanced options. You can set a reminder or add a collaborator from the tool bar in each note.
Google Keep also allows you to add labels to your notes. This are handy when you have a bunch of notes to keep track of. The labels serve as keywords. So, you can have multiple labels for the same note. You will see you labels off to the left.
Have you used Google Keep to help you stay organized? Do you have any tips or tricks? Please share!
If left to my own devices I would use all of my classroom planning time organizing my supplies and labeling ALL THE THINGS. While I enjoy these tasks, there are typically things that should be doing instead. I need a bit more guidance if I plan to get anything important accomplished. Making a to-do list is helpful, I am often overwhelmed by the number of tasks I need to complete. The work never seems to end!
To-do lists are a great place to start, but they don't help you prioritize what is really important. I like to use a 4-square method (also known as the Eisenhower grid) when prioritizing my to-do list. Never heard of it? It is a simple way of mapping out the level of importance and urgency of each task.
This can help you decide what you need to work on now, and what can wait until later. Now don't get me wrong, if I really have my heart set on procrastinating I still pick something from the not important/not urgent section, but for the most part I try to spend my time in the upper left corner.
I like to start a 4-square list at the beginning of each week. I add in items and cross things out every day. In addition, I often move items from one section to another as the week progresses.
Do you want to try it out for yourself? Pick up this FREEBIE with a few different 4-sqare options.
Paper and pen not your thing? Click HERE check out how I use Google Keep as a digital alternative.
What about you? How do you prioritize your work load? Please share!
I am always looking for ways to streamline data collection. In the past, I was only tracking the behavior of students if it was related to an IEP goal, or if we were beginning to notice a spike in behavior. And while this worked, it isn't always enough. This year I found a way to track all of my students' behavior in less than one minute a day... AND I don't even need to pick up a pen!
To make this happen, I use two things: Google Forms (check below for the FREEBIE!) and an Amazon Fire tablet. While you don't need the tablet to use Google Forms, it does make it more convenient for staff to document behavior without having to access the computer. Google Forms is free and easy to use. It is basically a survey that gathers and analyzes any type of information.
I will be honest, I have always been a bit resistant to using a tablet for data collection for a couple of reasons.
1. I give all of my tech to my students.
2. TECH IS EXPENSIVE! (or so I thought...)
The Amazon Fire tablet is actually pretty inexpensive. You can typically find them for less than $50, which is a killer deal. Now that I have the tablet I find that I use it for far more than just data collection, but that's a topic for another post!
Now that you know what I use, here is how you can make it for yourself!
First, download a copy of the Google Forms Digital Classroom Behavior Log. Open the file and click on the link. You will be prompted to save a copy of the Google Forms template.
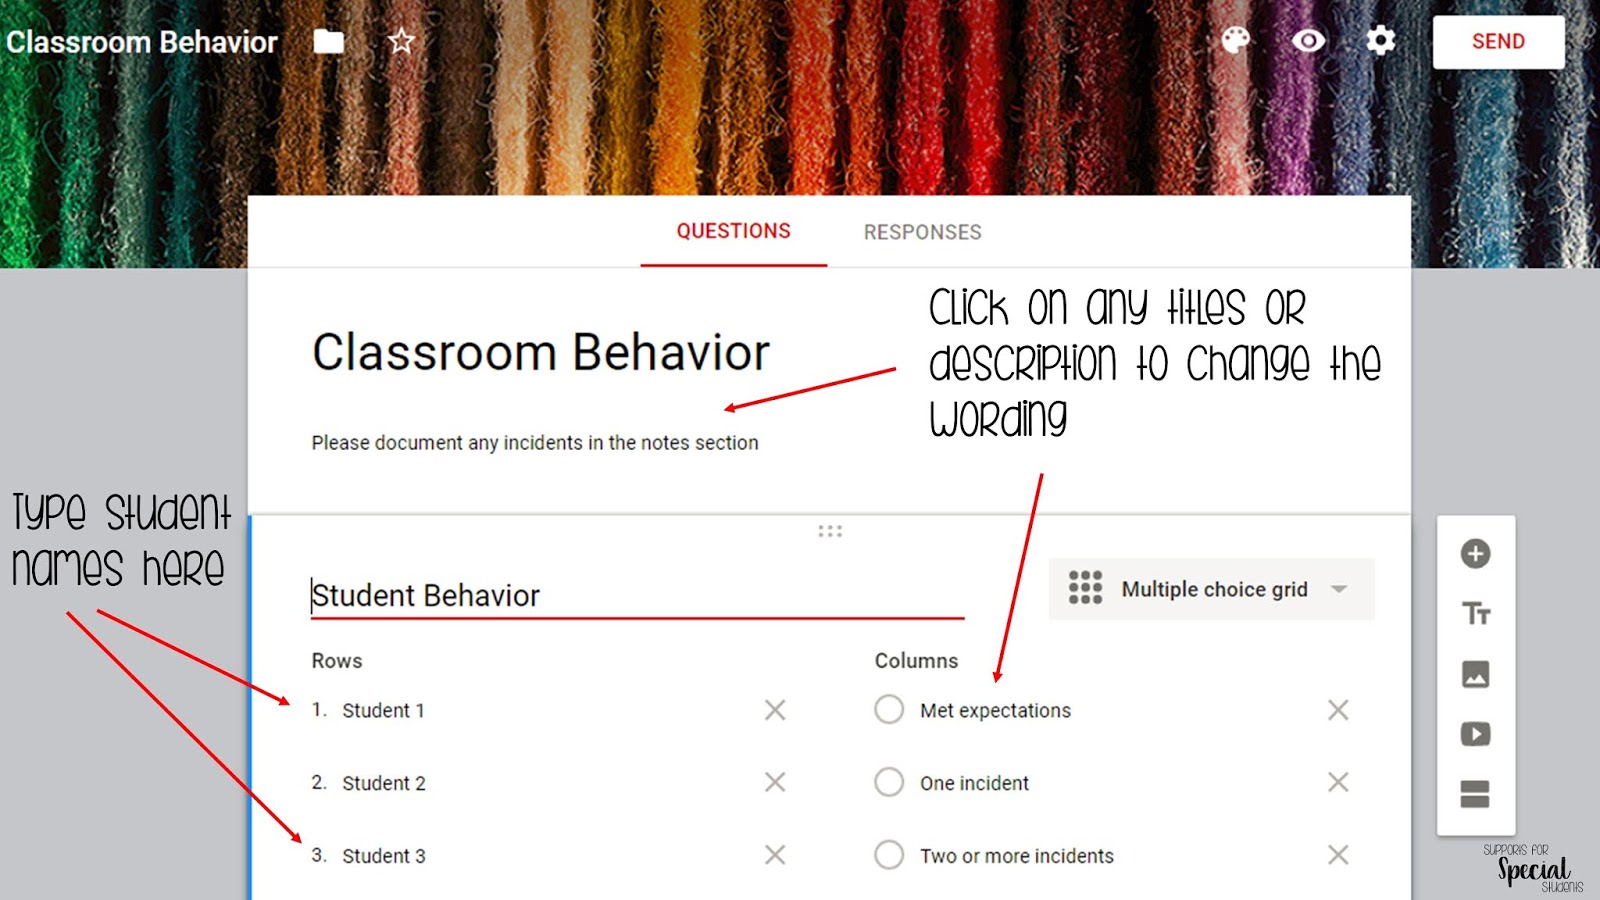
Next, type all of your students' names in the left column. You can also change titles for each behavior rating to meet the needs of your classroom. And... that's it! Your form is all set up! Pretty easy, right!?!
Now it is time to give it a test run and view your responses. Don't worry, you can delete your responses later. Click on the preview icon in the upper right corner. This will bring you to the actual form that you will fill out to track behavior.
Select one of the behavior options for each student and add a note at the bottom to detail any incidents that happened during the day. Then hit the submit button to record your information.
Click "submit another response" to head back to the form.
Are you ready to take a look at your responses? Click on the orange pencil in the upper right corner to get into editing mode.
Next, click on the responses tab. This will give you a your data in a bar graph. Hover over each bar to get more detailed information. You can also download the responses in a Google Sheets file. This is a great option if you need to find information from a specific date or time period.
Now that you have had a chance to play around with the form, you may want to delete the information that you submitted so that you can start fresh with your students. Just click on the 3 dots in the upper right corner and select "delete all responses."
This Google Form is easy to access from anywhere with an internet connection. All you need to do is access the URL. This can be done by creating a bookmark, or saving the link to your desktop.
Would you like to see a video of these steps in action? Click on the video below and I will walk you through of the entire process.
Are you ready to give it a try? I would love to hear how it goes for you!
(This post contains Amazon affiliate links. I only link to products that I personally use and find beneficial. Please click HERE for more information.)











 Posts
 I am an elementary self contained special education teacher who loves sharing ideas on how to best meet the needs of our amazing students!


